
How to Auto start/stop of Azure Virtual Machines
Introduction
Managing costs in cloud environments is crucial for optimizing resource usage. Auto start and stop of Azure Virtual Machines (VMs) during non-business hours is an effective way to save costs by ensuring that resources are only active when needed. In this article, we’ll explore how to auto start and stop azure vm.
Prerequisites
Before starting the setup, ensure the following prerequisites are met:
- Azure Virtual Machine(s):
At least one Azure VM needs to be provisioned. - Log Analytics Workspace:
Used for collecting and analyzing logs and metrics. - Automation Account:
This will hold the automation runbooks and configurations required to manage tasks for Azure resources.
How to Auto start/stop of Azure Virtual Machines
Follow these steps to set up automatic startup and shutdown of Azure VMs:
Step 1: Log in to the Azure Portal
- Open the Azure Portal.
- Log in with your credentials.
Step 2: Create an Automation Account
- In the search bar, type Automation Accounts and select it.
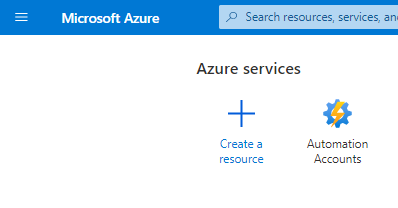
- Click on + Create.
- Fill in the required details:
- Subscription: Select your subscription.
- Resource Group: Choose an existing resource group or create a new one.
- Automation Account Name: Provide a unique name.
- Region: Choose the region for your Automation Account.
- Leave the remaining fields with default values.

- Click Review + Create, then Create to deploy the Automation Account.
Step 3: Add the Start/Stop VM Solution
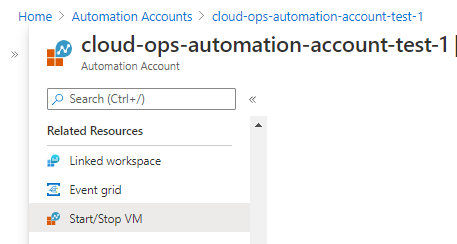
- After the Automation Account is created, click Go to Resource.
- Under Related Resources, locate Start/Stop VM and click Manage the Solution.
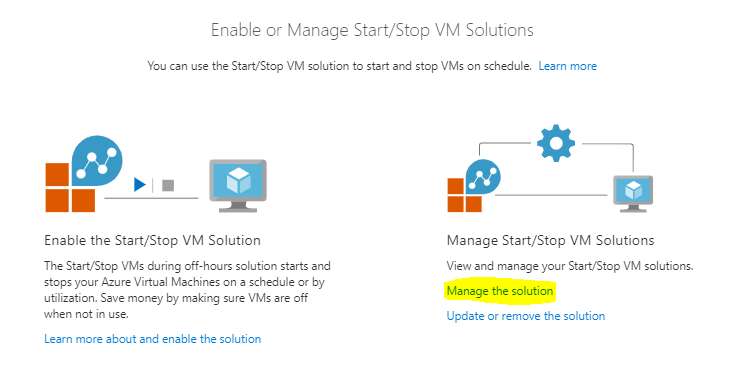
Step 4: Search for the VM Solution in the Marketplace
- Click + Create Solution.
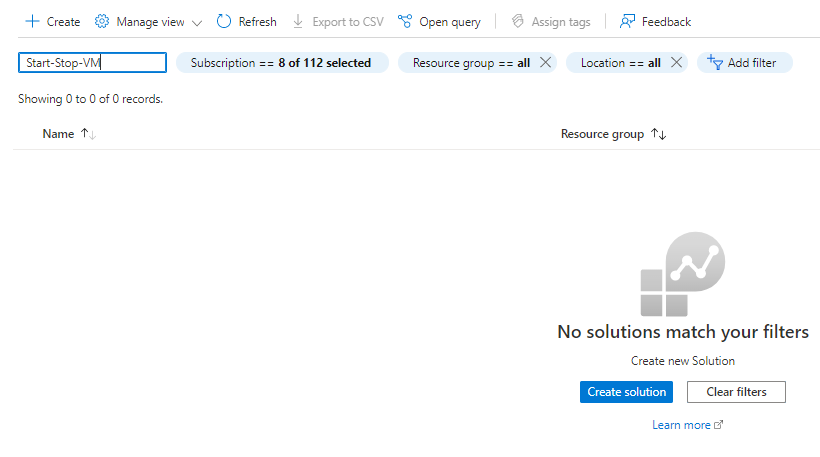
- In the Search the VM Solution Marketplace field, search for Start/Stop VMs during off-hours.
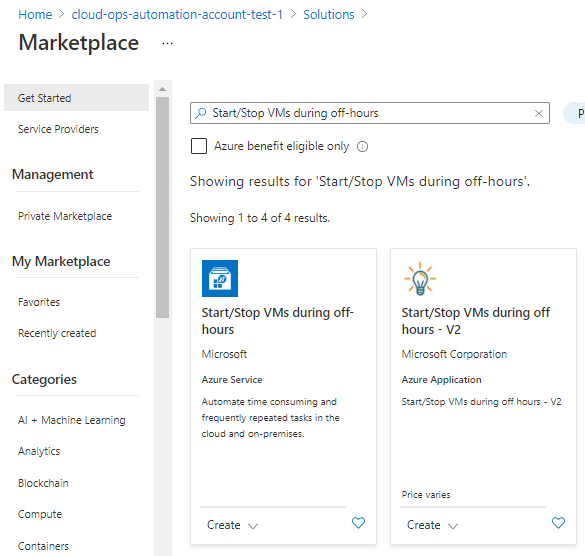
- Select the solution and click Create.

Step 5: Configure the VM Solution
- In the Add Solution window:
- Select your Log Analytics Workspace. This workspace will store logs for the VM operations.
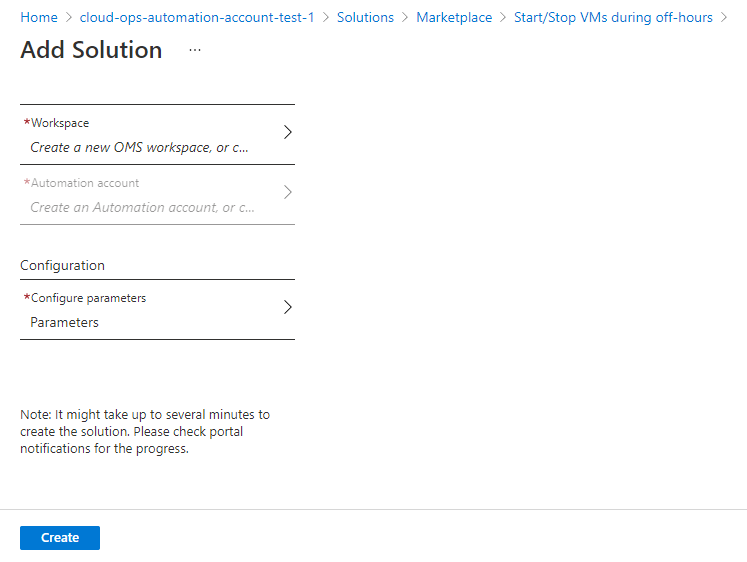
- Choose the Target Resource Group for the VMs you want to manage.
- Use
*to include all resource groups in your subscription.
- Use
- Azure VM Exclude List: If there are VMs you don’t want to include in this automation, specify them here (e.g., VMs required to run 24/7). Leave it blank if none.
- Schedule Start Time and Stop Time: Specify the desired times for starting and stopping the VMs. Use UTC for the time zone.
- Email Notifications: Enable email functionality to receive notifications about the automation actions.
- Set Receive Email Functionality to Yes.
- Add the email addresses to be notified (e.g.,
[email protected]).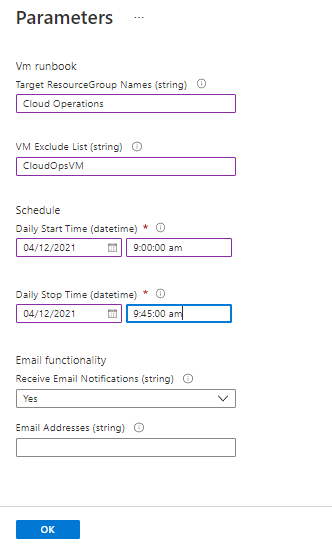
- Select your Log Analytics Workspace. This workspace will store logs for the VM operations.
- Click OK to save the configuration.
Step 6: Provision the Solution
- Review the configuration and click Create to apply the solution.

- Wait for the deployment to complete, which may take a few minutes.
Verification
To ensure the setup is working:
- Wait for the configured start or stop time to trigger.
- Verify that the VMs are starting and shutting down as per the schedule.
- Check the Log Analytics Workspace for logs related to the automation tasks.
- Review email notifications for task updates.
Best Practices
- Set Exclude Lists Carefully:
Ensure critical VMs that must run 24/7 are excluded from the automation. - Use UTC Time Zone:
When scheduling the start and stop times, always use Coordinated Universal Time (UTC) to avoid discrepancies. - Monitor Logs Regularly:
Use the Log Analytics Workspace to verify that automation tasks are running smoothly. - Test Automation in Non-Production:
Before applying the automation to production workloads, test it on non-critical VMs. - Enable Notifications:
Set up email notifications to stay informed about task execution and potential issues.
Benefits of Auto Startup and Shutdown for Azure VMs
- Cost Savings:
Reduces costs by stopping VMs during non-business hours. - Automation:
Removes the need for manual intervention to start or stop VMs. - Flexibility:
Allows scheduling based on business needs. - Efficient Resource Management:
Ensures resources are only used when required.
Troubleshooting Tips
- VMs Not Starting/Stopping as Scheduled:
- Check the Log Analytics Workspace for error logs.
- Verify that the Automation Account has the necessary permissions to manage the VMs.
- Email Notifications Not Received:
- Ensure email functionality is enabled and the correct email addresses are configured.
- Check spam or junk folders.
- Automation Solution Deployment Fails:
- Verify that the selected Log Analytics Workspace is active.
- Ensure there are no conflicting configurations in your Azure subscription.
- Timezone Discrepancies:
- Confirm that the schedule times are set in UTC.
Conclusion
Setting up auto start and shutdown for Azure VMs is a cost-effective way to optimize resource usage during non-business hours. By leveraging tools like Automation Accounts and Log Analytics Workspace, organizations can efficiently manage VM operations while minimizing manual intervention.
This solution not only reduces costs but also ensures better resource allocation, making it an essential practice for organizations using Azure Virtual Machines.
For more information, visit the official Azure Automation documentation.
For your information setup Start and Stop an AKS Cluster