How to Create Application Gateway in Azure 

Learn how to create and configure an Azure Application Gateway, a Layer 7 load balancer that manages web traffic for your virtual machines or services, ensuring high availability, scalability, and enhanced security.

Introduction

Azure Application Gateway is a scalable, highly available Layer 7 load balancer that manages web traffic. It enables features like URL path-based routing, SSL termination, and Web Application Firewall (WAF). Unlike traditional Azure Load Balancers that operate at Layer 4 (TCP/UDP), Application Gateway can route traffic based on HTTP headers, hostnames, and URL paths, providing greater control and security over web applications.

This guide provides step-by-step instructions to set up and configure an Application Gateway in Azure to distribute traffic across multiple virtual machines, ensuring web application performance, resilience, and scalability.

Key Features of Azure Application Gateway

  1. Layer 7 Load Balancing – Routes web traffic based on URL paths, HTTP headers, and hostnames.
  2. SSL Termination – Offloads SSL decryption from backend VMs, improving performance.
  3. Web Application Firewall (WAF) – Protects against common web vulnerabilities and attacks.
  4. URL Path-Based Routing – Directs traffic to specific backend pools based on URL paths.
  5. Multi-Site Hosting – Hosts multiple sites behind a single gateway with unique routing rules.
  6. Session Affinity – Ensures that user sessions are routed to the same backend server.
  7. Autoscaling – Automatically scales with traffic demand, ensuring availability during peak times.
  8. Health Probes – Monitors backend VM health and routes traffic only to healthy instances.
  9. Zone Redundancy – Supports deployment across availability zones for improved fault tolerance.
  10. Custom Error Pages – Customize responses for specific error codes, enhancing user experience.

How to Create Application Gateway in Azure 

Prerequisites

  • An active Azure account with a valid subscription.
  • Basic understanding of Azure networking and virtual machines.
  • Familiarity with HTTP/HTTPS protocols and SSL certificates (for SSL termination).

Sign in to Azure

  • An active Azure account with a valid subscription. If you don’t have one, create a free Azure account.
  • Basic understanding of Azure networking and virtual machines.
  • Familiarity with HTTP/HTTPS protocols and SSL certificates (for SSL termination).

Create a Virtual Network and Subnets

  1. In the Azure portal, search for Virtual Networks in the search bar.
  2. Select + Create to create a new virtual network.
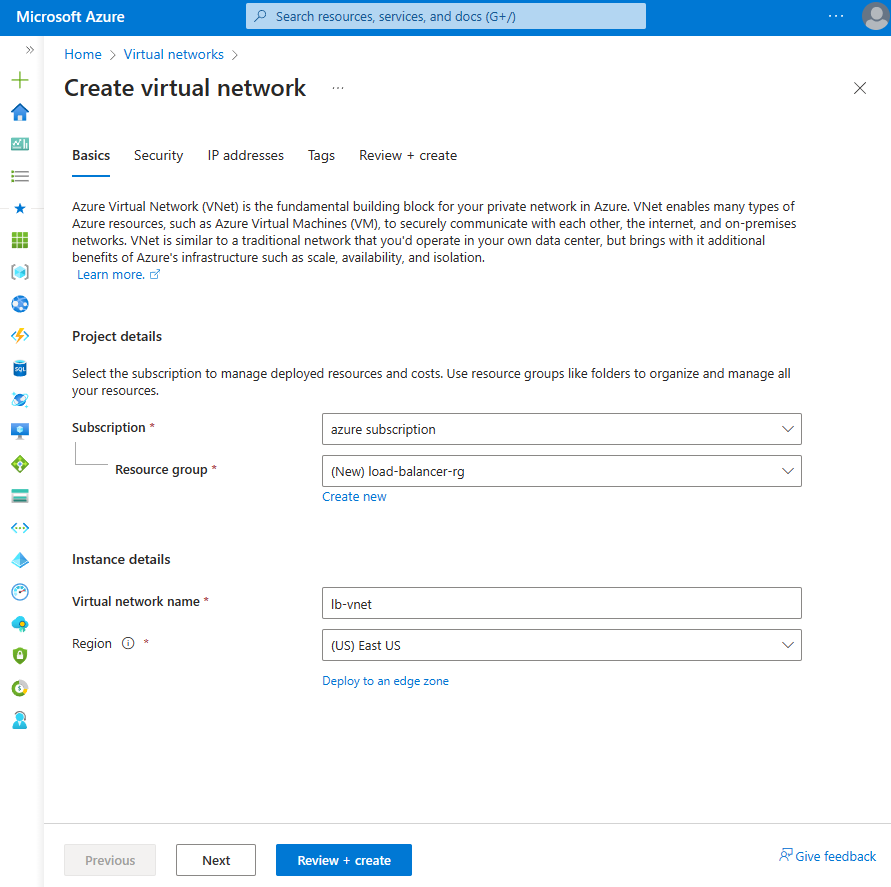
Basics Tab:

  • Subscription – Select your Azure subscription.
  • Resource Group – Create a new resource group and name it appgateway-rg.
  • Name – Enter appgateway-vnet.
  • Region – Choose East US or your preferred region.
  1. Click on the IP Addresses tab.
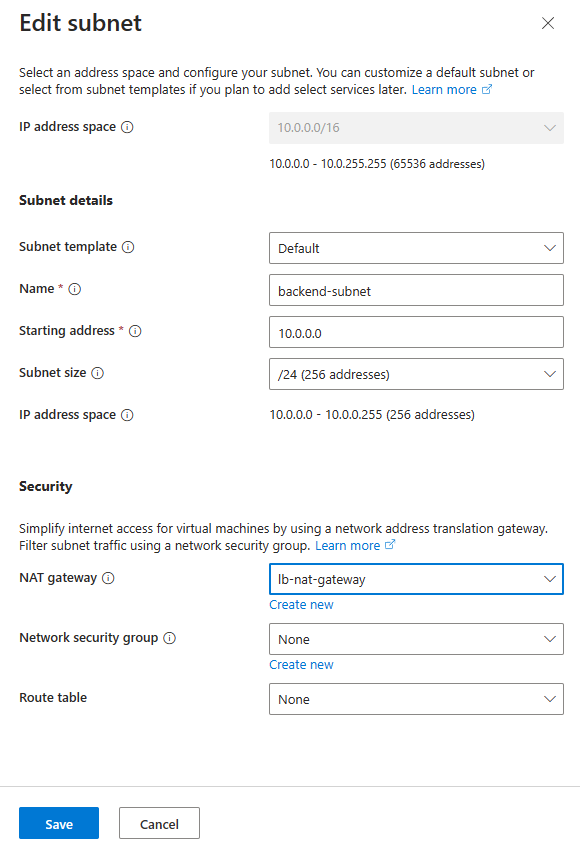
IP Addressing:

  • IPv4 Address Space – Enter 10.0.0.0/16.
  • Subnets – Create two subnets:
    • Frontend Subnet – Name it appgateway-subnet with 10.0.1.0/24.
    • Backend Subnet – Name it backend-subnet with 10.0.2.0/24.
  1. Click Review + Create and then Create after validation.

Create an Application Gateway

  1. In the Azure portal, search for Application Gateway in the search bar.
  2. Select + Create to begin the setup.

Basics Tab:

  • Subscription – Choose your subscription.
  • Resource Group – Select appgateway-rg.
  • Name – Enter appgateway.
  • Region – Select East US.
  • Tier – Choose Standard V2 for advanced features.
  • Virtual Network – Select appgateway-vnet.
  • Subnet – Choose appgateway-subnet (created earlier).


  1. Click on the Frontend IP tab.

Frontend IP Configuration:

  • Frontend IP – Create a new public IP and name it appgateway-pip.
  • IP Version – Select IPv4.
  1. Click on the Backend Pools tab.

Backend Pool:

  • Create a new backend pool and name it appgateway-backend.
  • Add virtual machines to the pool later after their deployment.
  1. Click on the Routing Rules tab.

Routing Rule:

  • Add a routing rule and name it appgateway-rule.
  • Listener Name – Enter appgateway-listener.
  • Protocol – Choose HTTP or HTTPS (for SSL termination).
  • Frontend Port – Enter 80 for HTTP or 443 for HTTPS.
  • Backend Target – Choose appgateway-backend.
  1. Click Review + Create and then Create after validation.

Deploy Virtual Machines for Backend Pool

  1. In the Azure portal, search for Virtual Machines and select + Create.

Basics Tab:

  • Subscription – Select your subscription.
  • Resource Group – Choose appgateway-rg.
  • VM Name – Enter web-vm1.
  • Region – Choose East US.
  • Availability Zone – Select Zone 1.
  • Image – Choose Windows Server 2022 Datacenter.
  • Size – Select an appropriate VM size.
  1. Create a second VM named web-vm2 in Zone 2 for redundancy.
  2. Under the Networking tab, ensure both VMs are part of the backend-subnet.

Add Virtual Machines to Backend Pool

  1. Go to the Application Gateway created earlier.
  2. Under Settings, select Backend Pools.
  3. Select the appgateway-backend pool and click + Add Target.
  4. Choose Virtual Machines and select web-vm1 and web-vm2.
  5. Click Save.

Install IIS and Test Application Gateway

  1. Connect to web-vm1 and web-vm2 using Azure Bastion or RDP.
  2. Open PowerShell and install IIS with the following commands:
 
Install-WindowsFeature -name Web-Server -IncludeManagementTools
Remove-Item C:\inetpub\wwwroot\iisstart.htm
Add-Content -Path \"C:\inetpub\wwwroot\iisstart.htm\" -Value $(\"Hello from \" + $env:computername)
  1. Close the session and repeat the process on both VMs.

Test the Application Gateway

  1. In the Azure portal, search for Public IP Addresses.
  2. Select appgateway-pip and copy the IP address.
  3. Paste the IP address into a browser.
  4. The IIS page should display “Hello from web-vm1” or “Hello from web-vm2,” confirming successful load balancing.

Benefits of Application Gateway

  • Layer 7 Load Balancing – Supports HTTP/HTTPS traffic, URL path-based routing, and cookie-based session affinity.
  • SSL Termination – Reduces backend VM load by decrypting SSL traffic at the gateway.
  • Web Application Firewall (WAF) – Protects web applications from common vulnerabilities.
  • URL-Based Routing – Directs traffic to different backend pools based on URL paths.
  • Multi-Site Hosting – Supports hosting multiple sites behind a single gateway.
  • Health Monitoring – Monitors VM health and stops routing traffic to unhealthy instances.

Advantages of Azure Application Gateway

  1. High Availability – Ensures constant application uptime by balancing traffic across healthy VMs.
  2. Enhanced Security – WAF protects against SQL injection, cross-site scripting, and other web vulnerabilities.
  3. Scalability – Automatically scales based on traffic loads.
  4. Cost-Effective – Eliminates the need for third-party load balancers by providing a native Azure solution.
  5. Performance Optimization – SSL termination and autoscaling improve application performance.
  6. Flexibility – Supports routing for different applications and hosting multiple websites.
  7. Centralized Management – Unified traffic management for multiple web applications.

Disadvantages of Azure Application Gateway

  1. Higher Cost – More expensive than basic Azure Load Balancers due to advanced features.
  2. Complexity – Configuration can be complex, requiring knowledge of web traffic patterns.
  3. Limited to HTTP/HTTPS – Does not support non-HTTP traffic (e.g., TCP/UDP applications).
  4. Latency – SSL termination can introduce slight latency, although typically minimal.
  5. Dependency on Azure – Operates only within Azure and cannot directly route traffic outside of Azure environments.

Conclusion

Azure Application Gateway is a critical component for managing and distributing web traffic at Layer 7. By following this guide, you have successfully configured an Application Gateway to load balance web traffic across virtual machines, enhancing scalability, availability, and security. Application Gateway provides advanced features like SSL termination, WAF, and URL-based routing, making it an essential tool for deploying robust web applications in Azure.


Related articles

Centralized Logging Architecture Multi Cloud : The 2026 Engineering Blueprint

Centralized Logging Architecture Multi Cloud Mastering The 2026 Engineering Blueprint The digital landscape of late 2026 has been defined by...

Cloud Deployment Models

Cloud Deployment Models Introduction In the era of digital transformation, cloud computing has become the cornerstone of modern IT infrastructure....

Cloud Resource Monitoring

Cloud Resource Monitoring Cloud resource monitoring and optimization are essential for ensuring the efficient use of infrastructure, controlling costs,...

aws ec2 instance schedule start stop​

AWS EC2 instance schedule start stop​ Managing the start and stop states of AWS EC2 instances is a crucial...