
How to Configure Kubernetes on Ubuntu
Kubernetes, often referred to as K8s, is a robust open-source container orchestration platform. It simplifies the automation of deploying, scaling, and managing containerized applications, making it an essential tool for modern DevOps workflows. This guide walks you through the installation and configuration of Kubernetes on Ubuntu, covering key features, troubleshooting steps, advantages, disadvantages, and much more.
1. What is Kubernetes?
Kubernetes is a highly extensible, open-source container orchestration tool initially developed by Google. It automates several aspects of container management, including deployment, scaling, and operations. Its architecture is designed to enable high availability, fault tolerance, and scalability for distributed applications.
Why Use Kubernetes?
- Simplifies containerized application management.
- Automates the scaling of applications.
- Offers seamless multi-cloud and hybrid cloud capabilities.
2. Key Features of Kubernetes
a. Automated Deployment and Scaling
Kubernetes enables automated deployment and scaling of applications, adjusting resources dynamically based on demand.
b. Self-Healing
Faulty containers are automatically restarted, ensuring application resilience.
c. Load Balancing
Kubernetes balances traffic across containers, ensuring optimal resource utilization.
d. Rolling Updates
Facilitates seamless updates without downtime by replacing containers incrementally.
e. Multi-Cloud Support
Compatible with on-premises, public, and hybrid cloud environments.
3. Prerequisites for Installing Kubernetes
- Ubuntu 20.04 or later
- A user account with
sudoprivileges - At least 2 CPUs and 2 GB RAM per node
- Stable internet connection
- Docker installed on all nodes (master and workers)
4.How to Configure Kubernetes on Ubuntu
Step 1: Update the System
Ensure your system is up to date:
sudo apt-get update -y
sudo apt-get upgrade -y
Step 2: Install Docker
Docker is a prerequisite for Kubernetes as it serves as the container runtime.
sudo apt-get install -y docker.io
sudo systemctl enable docker
sudo systemctl start docker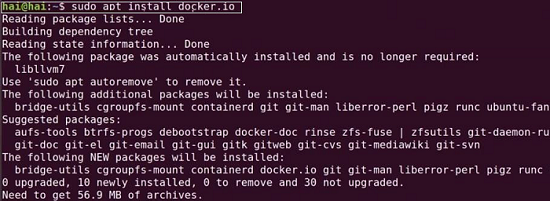

Step 3: Install Kubernetes Components
Install Kubernetes packages (kubeadm, kubectl, and kubelet):
- Add the Kubernetes repository:
sudo apt-get update sudo apt-get install -y apt-transport-https curl curl -s https://packages.cloud.google.com/apt/doc/apt-key.gpg | sudo apt-key add - echo "deb https://apt.kubernetes.io/ kubernetes-xenial main" | sudo tee /etc/apt/sources.list.d/kubernetes.list sudo apt-get update - Install the packages:
sudo apt-get install -y kubelet kubeadm kubectl
sudo apt-mark hold kubelet kubeadm kubectl
Step 4: Disable Swap
Kubernetes requires swap to be disabled:
sudo swapoff -a
sudo sed -i '/ swap / s/^/#/' /etc/fstab
Step 5: Initialize Kubernetes on the Master Node
Run the following command on the master node:
sudo kubeadm init --pod-network-cidr=10.244.0.0/16
Step 6: Configure kubectl for the Master Node
Set up kubectl to manage the cluster:
mkdir -p $HOME/.kube
sudo cp -i /etc/kubernetes/admin.conf $HOME/.kube/config
sudo chown $(id -u):$(id -g) $HOME/.kube/config
Step 7: Install a Pod Network Add-On
Deploy a network add-on like Flannel:
kubectl apply -f https://raw.githubusercontent.com/coreos/flannel/master/Documentation/kube-flannel.yml
Step 8: Join Worker Nodes
Use the token generated during the initialization of the master node. Run the following command on each worker node:
sudo kubeadm join <MASTER_IP>:6443 --token <TOKEN> --discovery-token-ca-cert-hash sha256:<HASH>
Step 9: Verify the Cluster
Check if all nodes are connected:
kubectl get nodes
Step 10: Setting Up Minikube (Alternative for Local Clusters)
If you prefer a simpler, single-node cluster, you can use Minikube:
- Install Minikube:
curl -LO https://storage.googleapis.com/minikube/releases/latest/minikube-linux-amd64 sudo install minikube-linux-amd64 /usr/local/bin/minikube - Start Minikube:
minikube start
5. Advantages of Kubernetes
- Portability: Works across multiple platforms, including public and private clouds.
- Scalability: Automatically adjusts resources based on workload.
- High Availability: Ensures minimal downtime through self-healing mechanisms.
- Resource Optimization: Efficiently manages hardware resources.
6. Disadvantages of Kubernetes
- Complex Setup: Requires expertise to configure and manage.
- Resource Intensive: Demands high system resources, which can be challenging for small setups.
- Steep Learning Curve: Advanced features require substantial knowledge and experience.
7. Troubleshooting Kubernetes Installation
Common Issues and Solutions
- Error: Swap is enabled
Solution: Ensure swap is disabled usingswapoff -a. - Pods stuck in Pending state
Solution: Verify that the network add-on is correctly installed. - Token expired during worker node joining
Solution: Generate a new token:kubeadm token create --print-join-command
8. Use Cases of Kubernetes
- Microservices Architecture: Manage complex, distributed systems with ease.
- CI/CD Pipelines: Automate application testing and deployment.
- Hybrid Cloud Deployments: Seamlessly integrate on-premises and cloud environments.
- Big Data Processing: Run distributed data processing frameworks like Apache Spark.
9. Further Resources
This comprehensive guide ensures you’re equipped with the knowledge to install and configure Kubernetes on Ubuntu effectively. Leverage Kubernetes to streamline containerized application deployment and management today!