
🔄 Create Logic App in Azure
🌟 Introduction
Azure Logic Apps is a cloud-based service that helps you automate workflows across various applications and services. The Consumption Type Logic App is a pay-as-you-go option, meaning you only pay for the executions you use. It’s an ideal choice for workflows that don’t run continuously but need flexibility and scalability when they do.
In this guide, we’ll walk you through creating a Logic App of Consumption type, highlighting its features, benefits, advantages and disadvantages, and best practices to make the most out of it.
💡 What is a Logic App of Consumption Type?
A Logic App of Consumption Type in Azure allows you to automate workflows by connecting multiple systems, applications, and services. It uses triggers and actions to define workflows, where you only pay for what you use, making it a cost-effective solution for event-driven workflows.
Common Use Cases:
- Data integration between systems (e.g., CRM to database).
- Automating email notifications or approvals.
- Monitoring and responding to events in real time.
- Integrating APIs or legacy systems with modern applications.
✅ Key Features of Logic Apps (Consumption Type)
- Pay-as-You-Go: Only pay for the executions and connectors you use.
- Wide Connector Library: Access hundreds of pre-built connectors for popular services like Office 365, Salesforce, and more.
- Event-Driven Execution: Workflows are triggered by events, making them efficient and lightweight.
- Visual Designer: Use a drag-and-drop interface in the Azure Portal to create workflows.
- Integration with DevOps: Deploy and manage Logic Apps using Azure DevOps or GitHub workflows.
- Custom APIs: Integrate your custom APIs for unique workflow requirements.
💡 Benefits of Logic Apps (Consumption Type)
- Cost-Effective: Only pay for the actions executed, making it ideal for occasional workflows.
- Quick Deployment: Set up workflows in minutes with no need for extensive coding.
- Scalable: Automatically scales to handle workload spikes.
- Wide Integration: Connects with on-premises, cloud, and third-party services.
- Visual Workflow Design: Build workflows with a user-friendly, drag-and-drop interface.
🌟 Advantages of Azure Logic Apps (Consumption Type)
- No Infrastructure Management: Fully managed service with no need to worry about servers.
- Flexibility: Supports a wide range of triggers and actions.
- Global Reach: Hosted in Azure’s global data centers, ensuring low latency and high availability.
- DevOps Integration: Automate deployment and updates using CI/CD pipelines.
- Built-In Monitoring: Monitor workflows in real time using Azure Monitor and Application Insights.
⚠️ Disadvantages of Azure Logic Apps (Consumption Type)
- Execution Costs for Frequent Workflows: For workflows with high execution rates, costs can accumulate quickly.
- Cold Start Delays: Workflows may experience slight delays during initial execution due to the serverless model.
- Learning Curve: Advanced use cases may require knowledge of JSON and Azure integrations.
- Dependency on Connectors: Limited functionality if the required connectors are unavailable.
🛠️ How to create logic app in azure
📌 Step 1: Log in to the Azure Portal
- Go to the Azure Portal and sign in with your credentials.
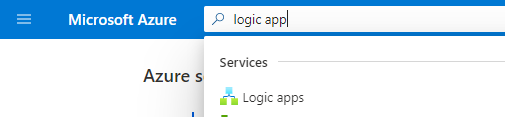
📌 Step 2: Navigate to Logic Apps
- Search for “Logic Apps” in the Azure Portal search bar and select the service.
- Click + Create to start creating a new Logic App.
📌 Step 3: Configure the Basic Details
- Fill in the required fields:
- Subscription: Select the subscription to use.
- Resource Group: Choose an existing resource group or create a new one.
- Logic App Name: Enter a unique name for your Logic App (e.g., `MyFirstLogicApp`).
- Region: Choose a region close to your users for optimal performance.
- Under Plan Type, select Consumption.

📌 Step 4: Define the Workflow
- Once the Logic App is created, open it from the Resource Group or Logic Apps section.
- Use the Logic App Designer to define your workflow:
- Trigger: Choose an event or schedule to trigger your workflow (e.g., “When an email arrives”).
- Actions: Add actions like sending emails, updating databases, or calling APIs.
📌 Step 5: Save and Test the Logic App
- Click Save to store your workflow configuration.
- Trigger the Logic App manually or wait for the defined trigger event to occur.
- Verify execution using the Run History in the Logic App settings.
Prerequisites:
- Azure Subscription and access to Azure Active Directory.
- Azure Logic Apps resource.
- Azure AD app registration with appropriate permissions (e.g., User.ReadWrite.All or Directory.Access).
- Admin consent for the necessary permissions (for example, User.ReadWrite.All).
Step-by-Step Process:
Step 1: Create an Azure Logic App
- Go to the Azure Portal and search for Logic Apps.
- Click on Create, and fill in the necessary details (resource group, region, name, etc.).
- Click on Review + Create and then click Create to provision the Logic App.
Step 2: Set Up the Logic App Workflow
- After the Logic App is created, click on Go to resource to open your Logic App.
- In the Logic App designer, click on Blank Logic App to create a new workflow.
- In the designer, choose a trigger for when you want to create a user. For example, you can use the When an HTTP request is received trigger or any other trigger like Recurrence if you want to schedule the creation of a user.
- If you want to use the HTTP request trigger, select When an HTTP request is received.
Step 3: Add the Azure AD “Create User” Action
- After selecting the trigger, click on + New step to add an action.
- In the Search connectors and actions box, search for Azure AD and select the Azure Active Directory connector.
- If this is your first time using Azure AD in Logic Apps, click on Sign in and authenticate with your Azure AD credentials. Grant the required permissions when prompted.
- Once signed in, select Create user from the list of actions.
Step 4: Configure the “Create User” Action
Now, you need to configure the Create user action by specifying the required information for the new user:
- User Principal Name (UPN): The email address of the user (e.g.,
[email protected]). - Display Name: The full name of the user (e.g.,
New User). - Password: The password for the new user (You may set a random password or use a pre-defined one).
- Mail Nickname: Alias used in email addresses.
- Account Enabled: Choose whether the account should be enabled (e.g.,
trueorfalse).
Here’s an example of the required fields for the “Create user” action:
{
    "userPrincipalName": "[email protected]",
    "displayName": "New User",
    "passwordProfile": {
        "forceChangePasswordNextSignIn": true,
        "password": "TempPassword123!"
    },
    "accountEnabled": true,
    "mailNickname": "newuser"
}
You can dynamically populate these fields based on the inputs from the trigger or other sources.
Step 5: Add Response (Optional)
If you’re using an HTTP trigger (like When an HTTP request is received), you can return a response after successfully creating the user. Click on + New step, then search for Response, and configure it like so:
- Status Code:
200 - Body: You can include the user details or a success message.
Example response body:
{
    "message": "User created successfully",
    "userPrincipalName": "@{outputs('Create_user')?['body/userPrincipalName']}"
}
Step 6: Test the Logic App
- Once you’ve finished configuring the Logic App, click Save.
- To test the Logic App, you can either:
- Manually trigger it by sending an HTTP request if using the HTTP trigger.
- If using another trigger, such as a recurrence or another event, wait for it to trigger automatically.
Step 7: Verify User Creation in Azure AD
- After the Logic App runs, go to Azure Active Directory in the Azure portal.
- Under Users, you should see the newly created user listed in the directory.
Example: Create User with HTTP Trigger (Detailed)
Let’s walk through an example using the When an HTTP request is received trigger:
- Trigger: When an HTTP request is received.
- This trigger will accept a JSON body to create a user.
- Create User Action: Configure the Create user action as described above, using the HTTP request body to provide the necessary information (e.g.,
userPrincipalName,displayName, etc.). - Response Action: After user creation, send a response back to the requester, such as a success message or the created user’s details.
Here is an example of the JSON body for the HTTP request:
{
    "userPrincipalName": "[email protected]",
    "displayName": "New User",
    "passwordProfile": {
        "forceChangePasswordNextSignIn": true,
        "password": "TempPassword123!"
    },
    "accountEnabled": true,
    "mailNickname": "newuser"
}
Once you send the HTTP request to trigger the Logic App, it will create the user in Azure AD and send a success response.
✅ Best Practices for Azure Logic Apps
- Optimize Connectors: Use built-in connectors where possible to reduce costs.
- Monitor Performance: Use Azure Monitor and Application Insights to track execution and troubleshoot errors.
- Use Retry Policies: Configure retry policies for actions that may fail due to transient issues.
- Control Costs: Schedule workflows to run during off-peak hours to minimize costs.
- Secure Access: Use Azure Key Vault to store and manage sensitive credentials.
🎯 Conclusion
Azure Logic Apps of Consumption Type offer a powerful, cost-effective solution for automating workflows and integrating applications. With its pay-as-you-go model, it’s an excellent choice for event-driven workloads that need flexibility and scalability.
Get started today by logging into the Azure Portal and creating your first Logic App. For more advanced scenarios, check out the official Azure documentation.
Learn More: Azure Cost Optimization