
Deploy Web App Using GitHub in Azure
Introduction
GitHub Actions is a powerful workflow automation tool integrated into GitHub, making it easy to automate your CI/CD (Continuous Integration and Continuous Deployment) pipelines. With GitHub Actions, you can trigger workflows for building, testing, and deploying web applications whenever specific events occur, such as commits, pull requests, or branch creations.
In this article, we’ll walk you through deploying a web application to Azure Web Apps using GitHub Actions. We’ll also explore how to monitor and debug the deployment process, ensuring a seamless experience.
What is GitHub Actions?
GitHub Actions is a feature of GitHub that allows you to automate workflows directly in your repository. You can define workflows in YAML files stored in the .github/workflows directory of your repository.
Key Features of GitHub Actions:
- Event-Driven Triggers: Workflows can run on specific events like
push,pull_request, orschedule. - Built-In CI/CD: Streamline application testing, building, and deployment.
- Extensibility: Supports custom and third-party actions for diverse use cases.
- Seamless Integration: Works natively with GitHub repositories.
How to Deploy Web App Using GitHub in Azure
Step 1: Navigate to Deployment Center in Azure
- Open the Azure Portal and go to your Web App.
- In the left-hand menu, select Deployment Center.
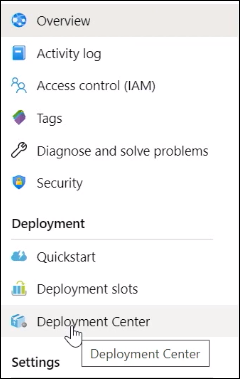
Here, you’ll find options to integrate with source control systems like Azure Repos, GitHub, and Bitbucket.
Step 2: Select GitHub and Configure GitHub Actions
- Choose GitHub as the source control system and click Continue.
- On the next screen, select GitHub Actions as your deployment option.
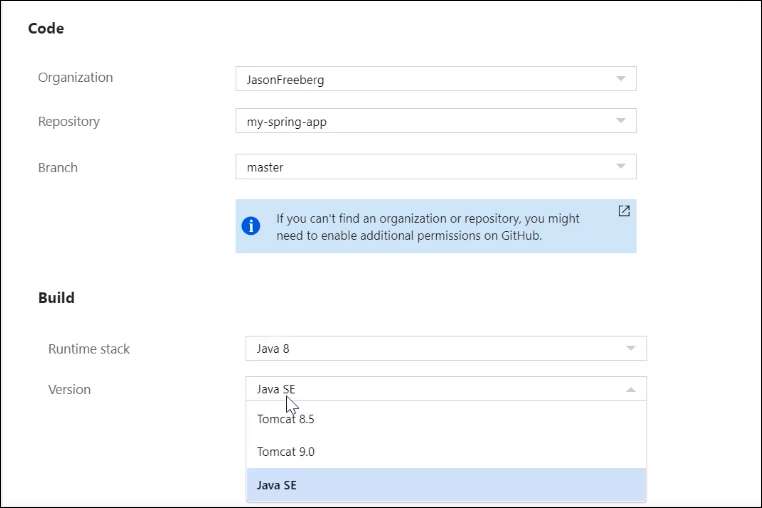
Step 3: Select Repository and Branch
- Select your GitHub account and repository where the application code resides.
- Choose the branch (e.g.,
masterormain) you want to use for deployment.
Step 4: Configure the Workflow File
- Choose the runtime environment:
- For a Spring Boot application, select Java SE.
- If deploying a Tomcat application, choose the appropriate Tomcat version.
- Azure will generate a workflow file for your application. The file defines the build and deployment process, including:
- Trigger Event: The workflow runs on a
pushevent to the selected branch. - Build Environment: Configures the Java version (e.g., Java 8) and builds the application using Maven.
- Deployment Step: Uses Azure’s deployment action to deploy the built application (e.g.,
.jarfile) to your Azure Web App.
- Trigger Event: The workflow runs on a
- Review the workflow summary and preview the YAML file before committing it to your repository.
Step 5: Commit the Workflow File
- Once you’re satisfied with the configuration, click Finish to commit the workflow file to your repository.
- Navigate to your GitHub repository to verify the newly created
.github/workflowsdirectory. Inside this directory, you’ll find the YAML file that defines the deployment process.
Step 6: Run and Monitor the Workflow
- In your GitHub repository, navigate to the Actions tab.
- You’ll see a list of workflows, including the one you just created. Select the workflow to view its runs.
- Click on the latest run to monitor the progress:
- View each step of the workflow (e.g., build, test, deploy).
- Search logs for errors or specific terms to debug issues.
Step 7: Verify the Deployment
- Once the workflow completes successfully, go back to the Azure Portal.
- In the Web App dashboard, you’ll see the deployment status reflected in real-time.
- Click Browse to open the deployed web application and verify it’s running.
Example Workflow File
Below is an example of the YAML file generated for deploying a Spring Boot application using GitHub Actions:
Key Features of GitHub Actions for Deployment
- Automated Workflows:
Automates the build and deployment processes triggered by events like code commits. - Logs and Debugging:
Provides detailed logs for each workflow step to help identify and resolve issues. - Customizable Workflows:
Tailor workflows to meet specific requirements using YAML configuration. - Integration with Secrets:
Securely store sensitive information (e.g., Azure publish profiles) using GitHub Secrets. - Cross-Platform Support:
Runs on Linux, macOS, and Windows environments.
Advantages of Using GitHub Actions for Deployment
- Simplified CI/CD:
Combines source control, automation, and deployment in a single platform. - Seamless Azure Integration:
Works natively with Azure Web Apps for streamlined deployment. - Customizable:
Fully customizable workflows to suit different project needs. - Real-Time Monitoring:
Monitor and debug workflows directly from the GitHub Actions dashboard. - Cost Efficiency:
Free for public repositories and includes generous free usage for private repositories.
Disadvantages of Using GitHub Actions
- Learning Curve:
YAML configuration and workflow customization may be challenging for beginners. - Limited Free Usage:
Private repositories have limited free usage, and exceeding the quota incurs costs. - Dependency on GitHub:
Requires storing code in GitHub repositories, which may not suit all organizations.
Best Practices for GitHub Actions Deployment
- Use Secrets for Sensitive Data:
Store sensitive information like Azure publish profiles securely in GitHub Secrets. - Test Workflows Locally:
Use tools like act to test workflows locally before committing them to the repository. - Monitor Workflow Performance:
Regularly review workflow logs to identify performance bottlenecks. - Use Branch Protection:
Restrict deployments to specific branches (e.g.,mainormaster) to avoid accidental triggers. - Leverage Reusable Workflows:
Use reusable workflows for common tasks to reduce duplication across repositories.
Troubleshooting Common Issues
1. Workflow Fails to Trigger
- Ensure the workflow file is located in the
.github/workflowsdirectory. - Verify the
onevent is correctly configured in the YAML file.
2. Deployment Fails
- Check logs for errors in the Deploy to Azure Web App step.
- Verify the Azure publish profile in GitHub Secrets is correctly configured.
3. Build Fails
- Ensure the correct Java version is specified.
- Check for missing dependencies in the Maven configuration.
Conclusion
Deploying web applications using GitHub Actions simplifies the CI/CD pipeline by integrating build and deployment processes directly into your GitHub repository. With its seamless integration with Azure Web Apps, GitHub Actions enables developers to automate deployments, monitor progress, and resolve issues efficiently.
By following the steps outlined in this article, you can set up a robust deployment pipeline for your web applications. Start leveraging the power of GitHub Actions to streamline your development workflows today.
For more details, visit the official GitHub Actions documentation or the Azure Web Apps documentation.