
Azure Arc Enabled Kubernetes
Introduction
Microsoft Azure Arc Kubernetes extends Azure’s management and monitoring capabilities to Kubernetes clusters running outside of Azure. These clusters could be located on-premises, on the edge, or in other cloud environments, and Azure Arc provides a unified way to connect and manage them.
By leveraging Azure Arc-enabled Kubernetes, you can use powerful Azure management tools like Azure Monitor, Azure Policy, GitOps, and Azure Security Center to monitor and govern these clusters seamlessly.
In this article, we’ll explore how to get started with Azure Arc-enabled Kubernetes, along with its key features, advantages, disadvantages, best practices, and troubleshooting steps.
What is Azure Arc Enabled Kubernetes?
Azure Arc-enabled Kubernetes allows you to connect your Kubernetes clusters to Azure, regardless of where they are hosted. This connection brings external clusters under Azure’s management umbrella, enabling centralized governance, monitoring, and automation.
Key Features of Azure Arc-Enabled Kubernetes:
- Unified Management: Centrally manage multiple Kubernetes clusters across environments.
- Azure Services Integration: Use Azure Monitor, Policy, and Security Center for enhanced insights and governance.
- GitOps Configuration: Automate application and cluster configuration using GitOps.
- Extensible Infrastructure: Supports hybrid and multi-cloud environments.
- Physical Location Tags: Tag clusters with their physical locations for better asset management.
Steps to Get Started with Azure Arc Enabled Kubernetes
Step 1: Search for Kubernetes in Azure Portal
- Log in to the Azure Portal.
- Search for “Kubernetes” in the search bar.
- Select Kubernetes – Azure Arc from the results. This opens a browse view for all on-premises Kubernetes clusters that are registered with Azure
Step 2: Register a New Kubernetes Cluster
- Click on the Register a New Cluster button. This opens the cluster registration blade.

- Review Prerequisites:
Ensure the following prerequisites are met:- An existing Kubernetes cluster running on-premises, edge, or another cloud provider.
- Azure CLI installed on your local machine.
- Sufficient permissions to register and configure the cluster.
- Create Cluster Representation on Azure:
- Assign a name for the cluster in Azure. This can be any name and does not need to match the actual cluster name.
- Choose the Azure region where the cluster representation will be located.
- Provide proxy server information if your cluster is behind an outbound proxy.

- Optional Tags: Use physical location tags to indicate the cluster’s real-world location (e.g., “Boston Data Center”).
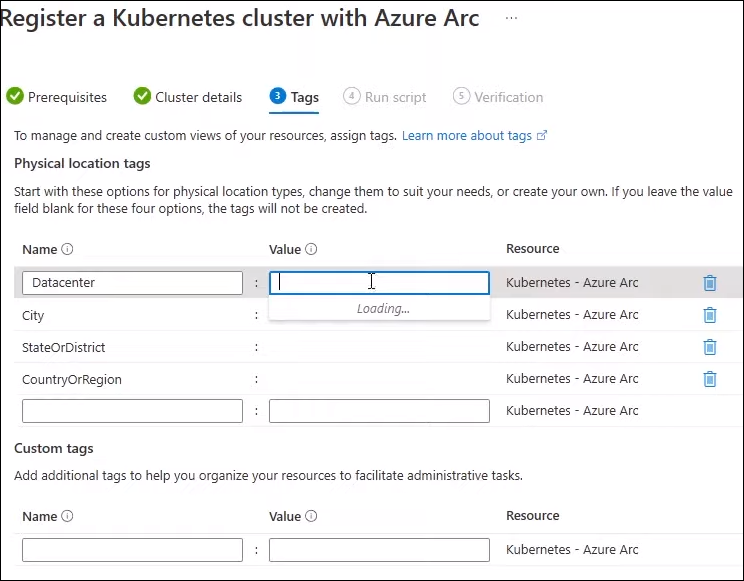
Step 3: Install Azure Arc Agent
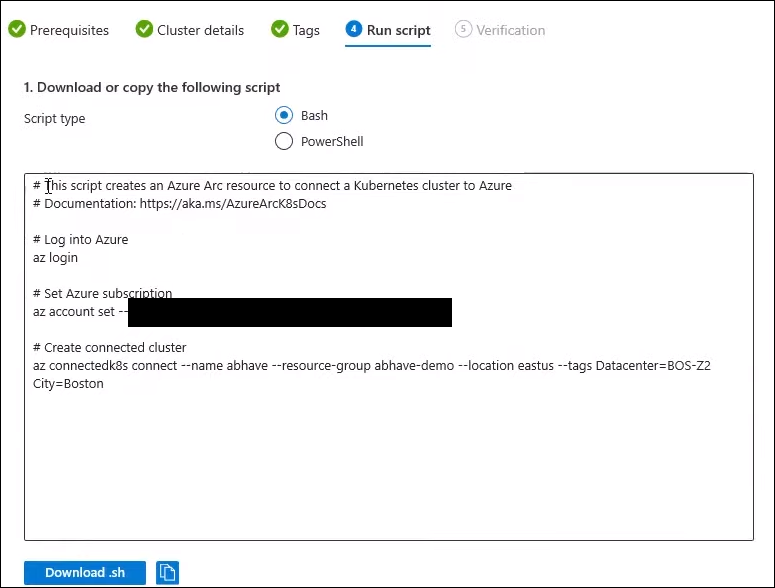
- Generate the registration script in the Azure Portal.
- Download the script and run it on your on-premises cluster.
- This script installs the Azure Arc agent on the cluster and completes the registration process.
Note: This step is performed outside the Azure Portal on your Kubernetes cluster.
- Verify Installation: After the registration process is complete, the “Go to Cluster” button in the Azure Portal will become enabled. Clicking this button will let you view and manage the cluster.
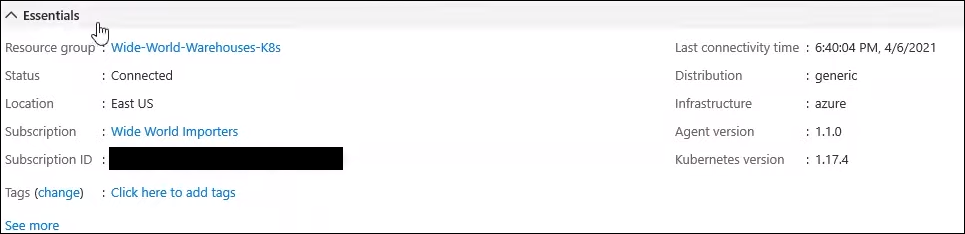
Step 4: Explore the Cluster Details
- Navigate back to the list of clusters in Azure Arc.
- Select the newly registered cluster to view its details, including:
- Kubernetes distribution
- Kubernetes version
- Infrastructure details
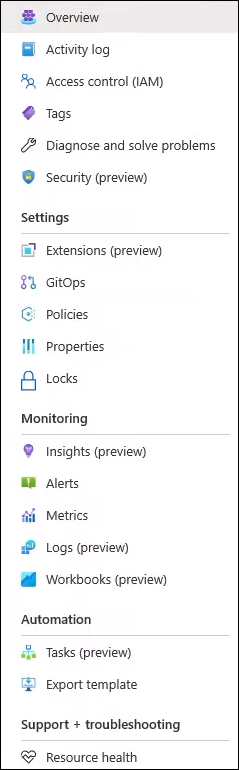
Step 5: Use Azure Management Tools
Azure Arc-enabled Kubernetes unlocks several capabilities for managing your cluster:
- Monitoring with Azure Monitor:
- Go to the Insights tab to set up container monitoring using Azure Monitor.
- GitOps Configuration:
- Use the GitOps tab to configure application and cluster management via GitOps.
- Azure Policy for Kubernetes:
- Navigate to the Policies tab to enforce compliance and governance rules across your cluster.
- Security Recommendations:
- Go to the Security tab to check for vulnerabilities or recommendations for improving cluster security.
- Cluster Upgrades:
- Use the Upgrade option to update the Kubernetes version running on the cluster.
- Use the Upgrade option to update the Kubernetes version running on the cluster.
Advantages of azure arc kubernetes
- Centralized Management:
Simplifies the management of multiple clusters across different environments. - Hybrid and Multi-Cloud Support:
Extends Azure’s capabilities to clusters hosted on-premises, edge locations, or other cloud providers. - Enhanced Governance:
Ensures compliance and security with Azure Policy and Azure Security Center. - Scalability:
Allows organizations to scale their operations seamlessly across diverse environments. - Automation with GitOps:
Streamlines application deployment and configuration management using GitOps workflows.
Disadvantages of Azure Arc-Enabled Kubernetes
- Complex Setup for Large Environments:
Registering and managing a large number of clusters may require significant effort. - Dependency on Azure:
Requires a connection to Azure for managing clusters, which may introduce latency or dependency concerns. - Additional Costs:
Using Azure services like Monitor, Policy, and Security Center may increase overall operational costs. - Learning Curve:
Teams unfamiliar with Azure tools may require training to utilize Azure Arc effectively.
Best Practices for Using Azure Arc Enabled Kubernetes
- Prepare the Environment:
Ensure all prerequisites are met, including permissions, Azure CLI installation, and proxy configurations (if applicable). - Use Tags Effectively:
Tag clusters with their physical locations or roles for better organization. - Monitor Regularly:
Use Azure Monitor and the Insights tab to track performance metrics and resource utilization. - Enforce Governance:
Leverage Azure Policy to ensure compliance across all clusters. - Secure Your Clusters:
Regularly review security recommendations in the Security tab and address vulnerabilities promptly. - Automate Configuration:
Use GitOps to manage application deployment and configuration across multiple clusters efficiently.
Troubleshooting Steps
1. Cluster Registration Fails
- Verify that the cluster meets all prerequisites.
- Ensure the Azure Arc agent is installed and running on the cluster.
- Check network connectivity between the cluster and Azure.
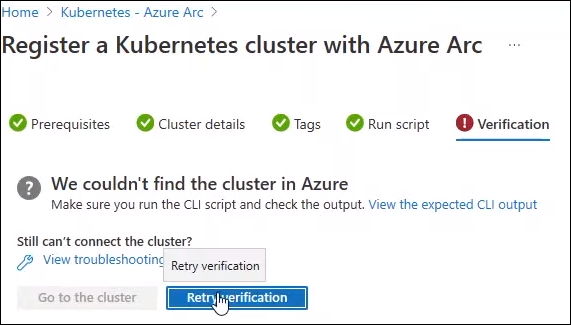
2. Cluster Does Not Appear in Azure Portal
- Confirm the registration script was executed successfully.
- Refresh the Azure Portal and check the Clusters list.
3. GitOps Configuration Issues
- Verify Git repository credentials and permissions.
- Ensure the GitOps agent is properly configured on the cluster.
4. Monitoring Issues
- Check Azure Monitor setup and ensure the correct namespace is being monitored.
- Review logs for errors in the Insights tab.
5. Policy Enforcement Fails
- Confirm that the correct Azure Policy definitions are assigned to the cluster.
- Ensure cluster resources comply with the specified policies.
Conclusion
Azure Arc-enabled Kubernetes is a game-changing solution for managing Kubernetes clusters across hybrid and multi-cloud environments. By integrating external clusters with Azure, you can leverage Azure’s powerful tools like Azure Monitor, Policy, and GitOps to enhance cluster performance, governance, and security.
With the steps outlined above, you can seamlessly register and manage your Kubernetes clusters using Azure Arc. Whether you’re running clusters on-premises, at the edge, or in another cloud, Azure Arc provides the flexibility and control needed to streamline operations and improve efficiency.
For more details, visit the official Azure Arc documentation.
Learn more about Create a Kubernetes Cluster in Azure