
How to Backup and Restore a Website on WHM/cPanel
If you host your website on a server with WHM/cPanel, creating backups and restoring them is crucial for safeguarding your data. Whether you’re moving to a new server, updating your website, or just want peace of mind, having a backup ensures that you can restore your website if anything goes wrong.
Let’s break down the backup and restoration process.
Part 1: How to Backup a Website in cPanel
Step 1: Log in to Your cPanel Account
Open your web browser and navigate to your cPanel URL (usually something like https://yourdomain.com:2083 or https://serverhostname:2083). Enter your cPanel username and password.

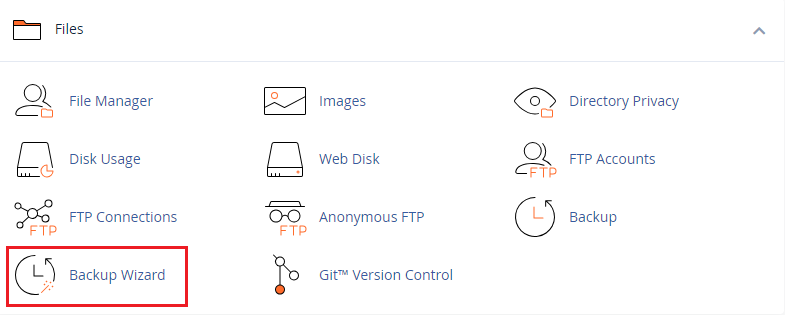
Step 2: Go to the Backup Section
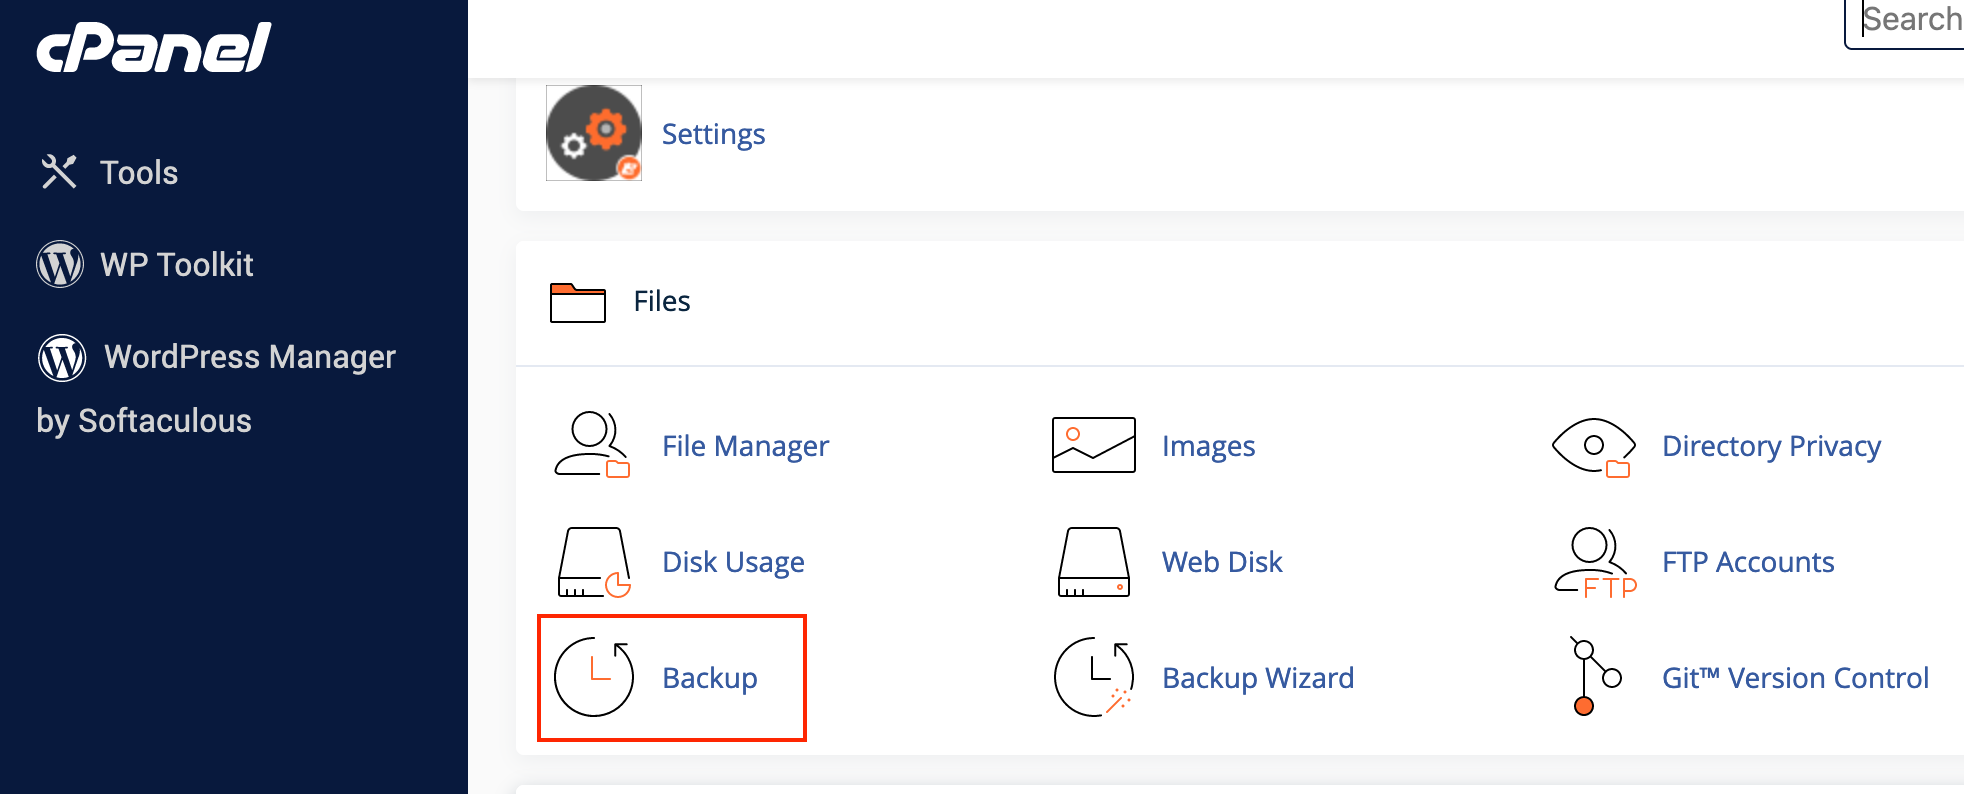
Once logged in, scroll down to the Files section and click on Backup Wizard or simply Backup. The Backup Wizard provides a step-by-step process, while Backup is a single-page tool with all options.
Step 3: Choose Full or Partial Backup
Full Backup: A complete backup of your website, including home directory files, databases, email accounts, and configurations.
Note: Full backups can only be restored by the server administrator (WHM access).
Partial Backup: Select parts of your account (e.g., Home Directory, MySQL Databases, Email Forwarders, etc.).
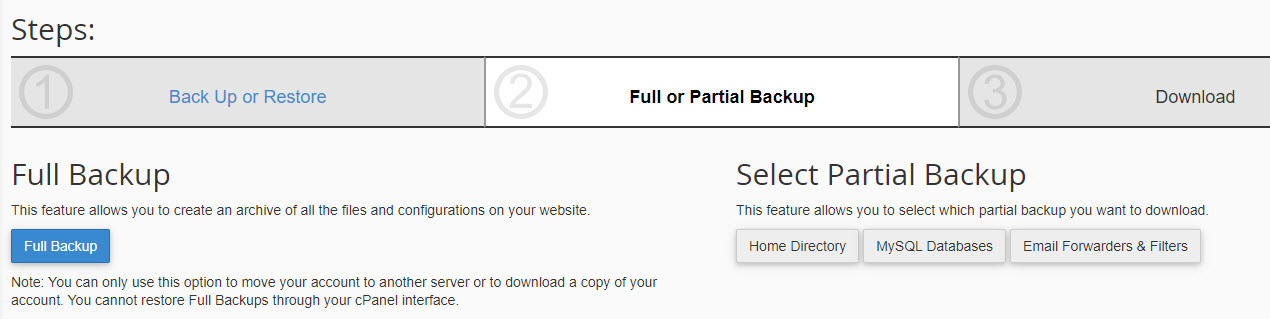
Step 4: Generate a Full Backup
Click Full Backup and choose a Backup Destination:
- Home Directory: Saves the backup within your cPanel account’s root folder.
- Remote FTP Server: Store the backup on a different server.
- Secure Copy (SCP): Transfer it securely over the internet.
Provide an email for notification or select “Do not send email notification” and click Generate Backup.
Step 5: Download Your Backup
Once the backup is generated, you’ll see it listed under “Backups Available for Download.” Click the backup file to download it to your local machine.
Part 2: How to Backup Specific Parts of Your Site in cPanel
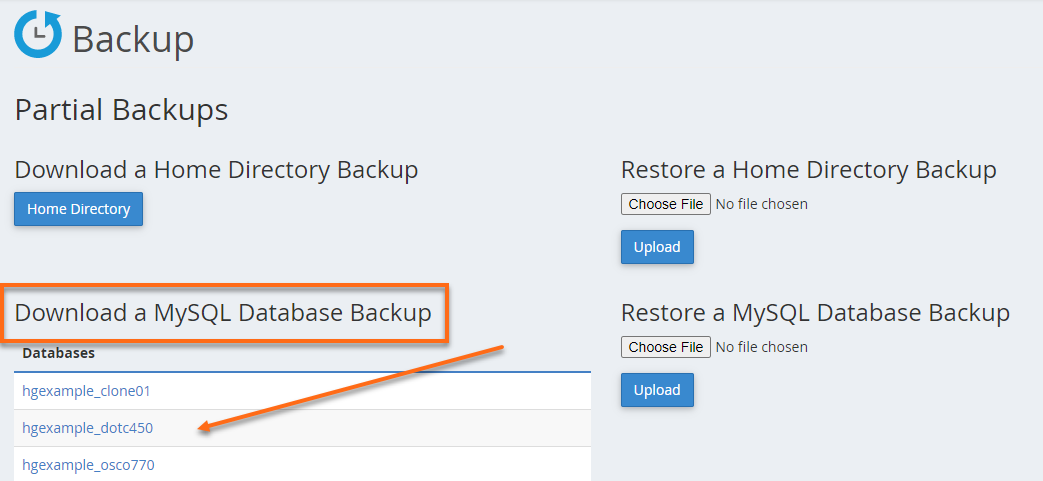
Backup Home Directory
In the Backup Wizard, click on Home Directory under Partial Backups and then click Download. Save the .tar.gz file to your local machine.
Backup MySQL Databases
Under the Backup Wizard, choose MySQL Databases, select the database you wish to download, and save the .sql file to your local machine.
Part 3: How to Restore a Website in cPanel
Step 1: Log in to Your cPanel Account
Access your cPanel account the same way as before.
Step 2: Go to the Backup Section
Navigate to the Files section, and click on Backup Wizard or Backup.
Step 3: Choose What to Restore
Under the Backup Wizard, click Restore and choose what to restore:
- Home Directory: Restore all files and directories.
- MySQL Databases: Restore database data.
- Email Forwarders and Filters: Restore email configurations.
Screenshot Suggestion: Display the restore options in the Backup Wizard.
Step 4: Upload the Backup File
Select the item you want to restore, click Choose File, locate your backup file on your local machine, and click Upload:
- For Home Directory: Select the
.tar.gzfile. - For Databases: Select the
.sqlfile.
Wait until the file uploads and the restoration completes.
Screenshot Suggestion: Show the restore file upload screen in cPanel.
Step 5: Verify Restoration
Once the restoration completes, verify that your website is functioning correctly. Check files, databases, and email settings to ensure all data is restored accurately.
Part 4: How to Backup and Restore a Website in WHM
If you have WHM (WebHost Manager) access as a server administrator, you can back up and restore full cPanel accounts.
Backup in WHM
- Log in to WHM: Go to
https://yourserverhostname:2087and log in with your WHM credentials.
Screenshot Suggestion: Show the WHM login page. - Navigate to the Backup Section: Use the search bar and type Backup. Click on Backup Configuration or Backup User Selection.
- Configure Backup Settings: Enable or disable backups, choose the backup type (compressed, uncompressed, or incremental), and set schedules.
Screenshot Suggestion: Display the backup settings and schedule options. - Manually Run a Backup: Search for Backup Now in WHM, then click Run Backup to create a backup immediately.
Restore in WHM
- Access WHM Restore Section: Log in to WHM, type Restore in the search bar, and click on Restore a Full Backup/cpmove File.
Screenshot Suggestion: Show the restore search option in WHM. - Select Backup to Restore: WHM allows restoring a full cPanel backup (cpmove files). Choose the cPanel account to restore from available backups, then click Restore.
Screenshot Suggestion: Display the backup file selection screen in WHM.
Tips for Backup and Restore Best Practices
- Backup Regularly: Schedule regular backups based on your website’s update frequency.
- Store Backups Safely: Store backup files in secure locations, such as an external server or cloud storage.
- Test Restorations: Periodically test restoring backups to ensure they work and familiarize yourself with the process.
- Database Backups: If your website relies heavily on databases, back them up frequently.
Conclusion
Backing up and restoring a website on WHM/cPanel is straightforward once you know the steps. The Backup Wizard in cPanel makes it easy to create full or partial backups and restore files or databases when needed. For server administrators, WHM provides additional flexibility and automation for backing up and restoring cPanel accounts. By regularly backing up your data and understanding the restoration process, you can safeguard your website from data loss, corruption, or errors.