
Kubernetes Cluster With Minikube
Creating a Kubernetes cluster on cloud platforms like AWS, Google Cloud, or Azure can be complex and often expensive. If you’re exploring Kubernetes or developing locally, Minikube offers an excellent way to set up a local Kubernetes cluster for learning and development purposes. Minikube simplifies the process, allowing developers to focus on building and testing their applications without worrying about cloud costs or configurations.
In this article, we’ll cover how to set up Minikube on a Linux system. Additionally, we’ll discuss its key features, benefits, troubleshooting steps, and more. By the end, you’ll have a functional Kubernetes cluster running locally, ready for experimentation.
Prerequisites
Before starting, ensure you have:
- Basic knowledge of Docker and Kubernetes.
- A Linux-based system with a package manager like
aptoryum. - VirtualBox or Docker installed on your machine.
- At least 2 CPUs, 2GB of RAM, and 20GB of disk space available.
These prerequisites ensure that your system is equipped to handle the lightweight Kubernetes cluster that Minikube creates. If you’re unsure about Docker or Kubernetes basics, reviewing introductory material beforehand is recommended.
Kubernetes Cluster with Minikube
1. Install Minikube
Minikube can be installed on Linux using the following commands. These commands download the Minikube binary and install it in a system-wide location for easy access:
curl -LO https://storage.googleapis.com/minikube/releases/latest/minikube-linux-amd64
sudo install minikube-linux-amd64 /usr/local/bin/minikube
Verify the installation by running:
minikube version
2. Start Minikube
Start Minikube with the VirtualBox driver. (You can also use Docker, but there may be bugs related to ingress.)
minikube start --driver="virtualbox"
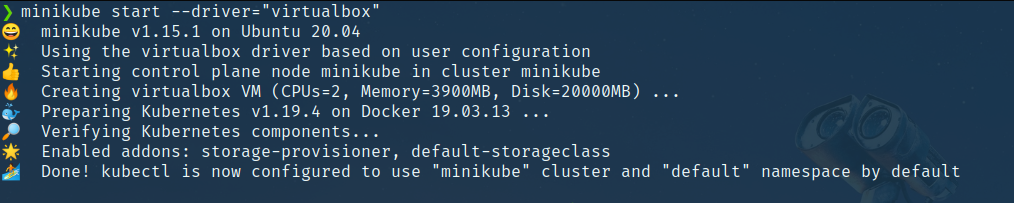 This command sets up a local Kubernetes cluster using VirtualBox as the virtualization layer. If you’re using Docker, replace
 virtualbox with docker. You can customize the resources allocated to Minikube using flags like --cpus and --memory. For instance:
minikube start --driver="virtualbox" --cpus=4 --memory=4096
3. Enable Add-Ons
Minikube supports various add-ons to enhance functionality. For this tutorial, enable the dashboard and ingress add-ons:
minikube addons enable dashboard
minikube addons enable ingress
The dashboard provides a GUI for monitoring your cluster, while ingress allows for routing external traffic to services within the cluster. These add-ons are critical for managing and interacting with your cluster efficiently.
4. Expose the Ingress Controller
Expose the ingress controller to make it accessible externally:
kubectl expose deployment ingress-nginx-controller \
  --target-port=80 --type=NodePort -n kube-system
Verify that the service is running:
kubectl get services -n kube-system
5. Set Up Secrets
For the example application, set up an environment variable for JWT authentication. Secrets are a secure way to store sensitive information like API keys, passwords, or tokens:
kubectl create secret generic jwt-secret --from-literal=JWT_KEY=asdf
6. Clone the Example Application
We’ll use a ticket-selling web application as an example. This application demonstrates Kubernetes’ capabilities with a real-world microservices-based project. Clone the repository from GitHub:
git clone https://github.com/afif1400/gittix-micro.git
cd gittix-micro
7. Run the Application
Use Skaffold to deploy the application to your local Minikube cluster. Skaffold automates building, pushing, and deploying your application:
skaffold dev
This command builds the Docker images, installs dependencies, and deploys services to your Kubernetes cluster. If the process fails, re-run the command. Skaffold makes iterative development faster by automatically rebuilding and redeploying changes.
8. Stop and Delete Minikube
Once done, you can stop or delete the Minikube cluster to free up system resources:
minikube stop
minikube delete
Stopping retains the cluster configuration, while deleting removes everything, allowing you to start fresh next time.
Key Features of Minikube
- Multi-Environment Support: Works with VirtualBox, Docker, and other virtualization tools.
- Add-Ons: Includes a range of add-ons like the dashboard, ingress, and storage classes.
- Port Forwarding: Easily expose Kubernetes services to the host machine.
- Resource Configuration: Allocate specific CPUs, memory, and disk space for your cluster.
- Local Hosting: Offers a platform for testing Kubernetes clusters without incurring cloud costs.
- Persistent Storage: Supports dynamic and persistent storage volumes for applications.
Key Benefits of Using Minikube
- Cost-Effective: Ideal for local testing and development, eliminating cloud costs.
- Ease of Use: Simple commands to set up, run, and manage the cluster.
- Fast Iterations: Quickly test applications without deploying to remote environments.
- Educational: Great for learning Kubernetes concepts.
- Integration with CI/CD: Works well with tools like Skaffold for continuous integration and deployment workflows.
Advantages and Disadvantages
Advantages
- Local development without the need for internet.
- Simplified Kubernetes learning curve.
- Support for multi-node clusters (experimental).
- Quick setup and teardown.
Disadvantages
- Limited scalability compared to cloud-based solutions.
- Performance depends on local machine resources.
- Not suitable for production environments.
- Some add-ons or features may behave differently compared to full cloud environments.
Troubleshooting Common Issues
1. Minikube Fails to Start
- Cause: Insufficient resources.
- Solution: Allocate more resources using flags:
minikube start --cpus=4 --memory=4096
2. Dashboard Not Accessible
- Cause: Network misconfiguration.
- Solution: Use the following command to access the dashboard:
minikube dashboard
3. Ingress Not Working
- Cause: Using Docker as the driver.
- Solution: Switch to VirtualBox:
minikube start --driver="virtualbox"
4. Skaffold Fails
- Cause: Dependency or build issues.
- Solution: Restart Skaffold:
skaffold dev
Conclusion
Setting up a local Kubernetes cluster using Minikube is an invaluable step for developers looking to learn or experiment with Kubernetes. Minikube provides a lightweight, cost-effective solution for testing applications and services locally. Its flexibility, add-ons, and seamless integration with tools like Skaffold make it a preferred choice for developers worldwide.
While it’s not designed for production use, Minikube is perfect for prototyping and local development. By following the steps outlined in this guide, you’ll be able to deploy, test, and troubleshoot Kubernetes applications efficiently. With continued practice, you can transition to managing larger clusters in cloud environments with confidence.
For more resources, check out the official documentation for Minikube, Skaffold, and Kubernetes. Happy clustering!
For more information refer below links
- Minikube Official Documentation
https://minikube.sigs.k8s.io/docs
Comprehensive documentation to install, configure, and use Minikube effectively. - Kubernetes Official Documentation
https://kubernetes.io/docs
A detailed resource for understanding Kubernetes concepts and features.