
🔄 Manage Azure Blob Lifecycles
🌟 Introduction to Azure blob storage lifecycle policy
Azure Blob Storage provides a cost-effective way to store data with different access tiers based on usage frequency. The Hot tier offers the fastest access but is the most expensive, while the Archive tier is the cheapest but slower. By using Lifecycle Management, you can automate the process of transitioning blob between these tiers or deleting them based on your specific requirements.
✅ Key Features of Azure Blob Lifecycle Management
- Automated Storage Optimization:
Lifecycle Management automates the process of moving blob between tiers (Hot, Cool, and Archive) based on access patterns. - Rule-Based Policies:
You can define rules to manage the lifecycle of blob, including moving or deleting them based on last-modified dates or other filters. - Granular Filtering:
Apply lifecycle rules to specific containers, blob types, or prefixes to ensure precise control over data transitions. - Cost Efficiency:
Automatically transition infrequently accessed data to lower-cost tiers or delete unneeded blob to reduce storage costs. - Support for Snapshots and Versions:
Lifecycle Management can also include blob snapshots and versions in its policies, enabling comprehensive data management.
🌟 Advantages of Azure Blob Lifecycle Management
- Simplified Storage Management:
Automates the otherwise manual task of moving blob between access tiers, saving time and reducing complexity. - Cost Savings:
Optimizes storage costs by ensuring data is always in the most appropriate tier. - Flexibility:
Supports diverse use cases with customizable rules and filters, providing precise control over blob lifecycle. - Improved Data Organization:
Keeps your storage account clean and organized by automatically deleting outdated or unnecessary blob. - Integrated with Azure Storage Accounts:
Seamlessly integrates with general-purpose v2 storage accounts for a unified experience.
⚠️ Disadvantages of Azure Blob Lifecycle Management
- Initial Setup Complexity:
Defining filters and rules for large or complex storage environments can require careful planning and expertise. - Risk of Data Deletion:
Misconfigured rules may result in accidental deletion of important data if policies are not carefully reviewed. - Delayed Access for Archived Data:
Data moved to the Archive tier may take hours to rehydrate, impacting time-sensitive retrieval needs. - Limited Control in Basic Accounts:
Advanced lifecycle features are available only for general-purpose v2 accounts, limiting functionality in older account types.
🛠️ How to create lifecycle policy for azure blob
Manage Azure Blob Lifecycles
📌 Step 1: Access the Azure Portal
- Log in to the Azure Portal.
- Navigate to the Storage Accounts section and select a general-purpose v2 storage account where you want to manage blob lifecycles.
📌 Step 2: Navigate to Lifecycle Management
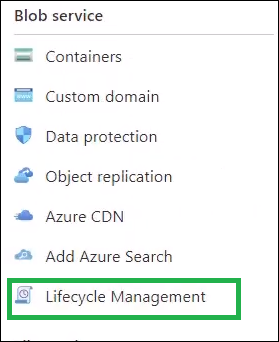
- Under your storage account, locate the Data Management section in the menu.
- Click on Lifecycle Management to open the lifecycle policy configuration.
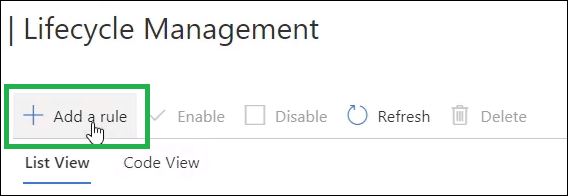
📌 Step 3: Create a New Rule
- Click + Add Rule to create a new lifecycle management rule.
- Provide a name for the rule to identify it easily later.
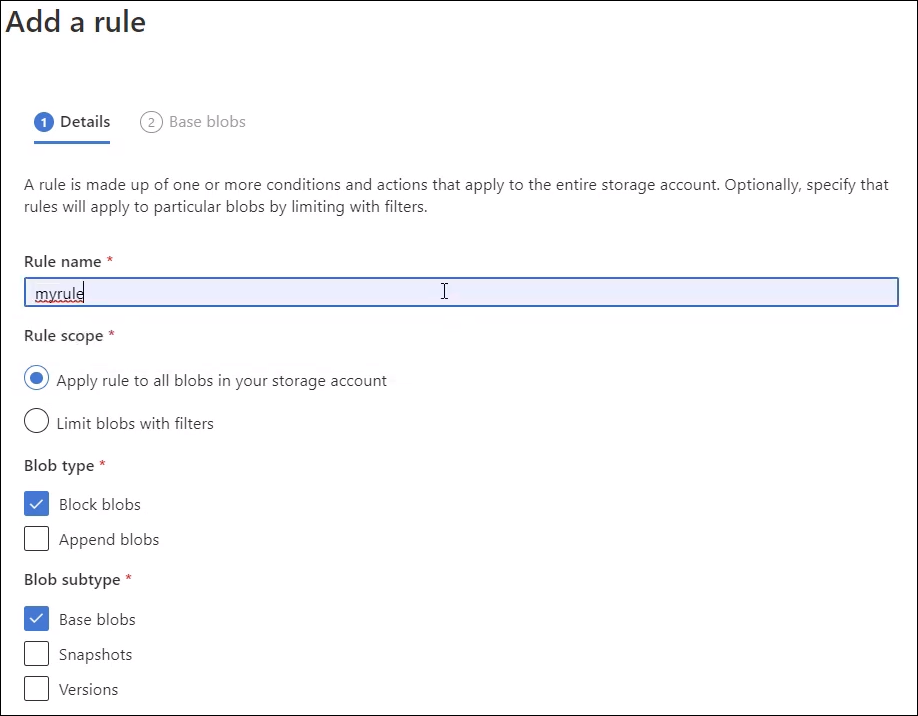
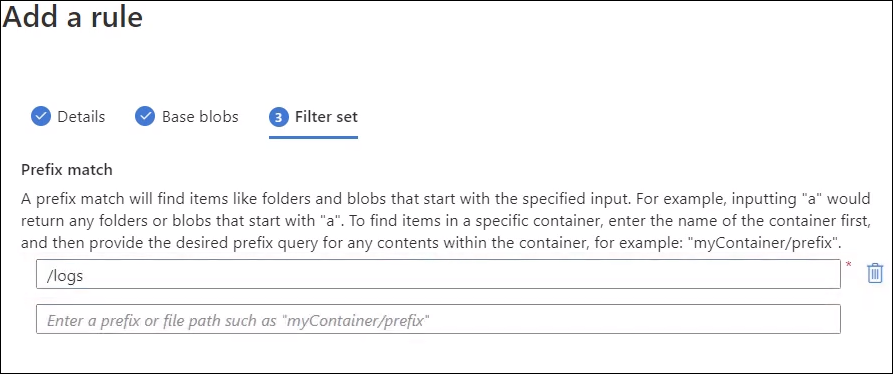
📌 Step 4: Define Blob Filters
- Choose whether the rule applies to all blob or only certain types:
- Block blob: Most commonly used blob type for unstructured data.
- Base blob: Default setting for standard blob.
- Include Snapshots and Versions: Optional; allows the rule to apply to blob snapshots and versions.
- Use filters to restrict the rule to specific containers or prefixes (e.g., apply only to blob in a container named “logs”).
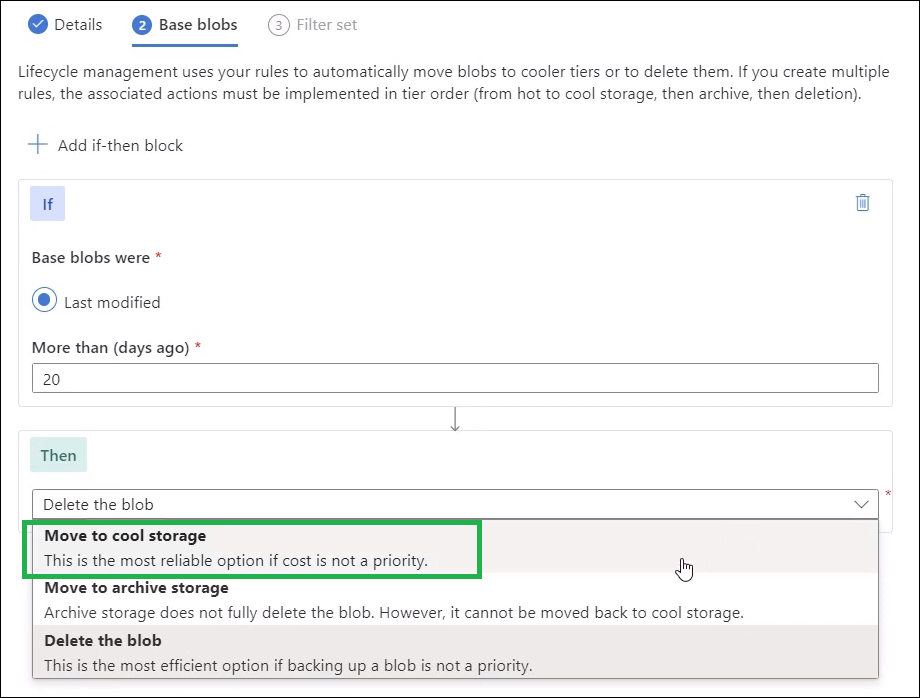
📌 Step 5: Set Transition or Deletion Rules
- Define the conditions under which blob will transition between tiers or be deleted:
- For example, if a blob hasn’t been modified in 20 days, move it to the Cool tier.
- Optionally, set a condition to delete blob after a certain number of days.
- Review and save your rule.
📌 Step 6: Review and Save Policies
- Review the newly created rule in the Lifecycle Management Rules list.
- Save the rule and verify it has been applied correctly.
Example: Transitioning blob to Cool Storage
Let’s implement a rule to transition blob from the Hot tier to the Cool tier if they haven’t been accessed in 20 days:
- Create a new rule named MoveToCoolStorage.
- Apply the rule only to Block blob in the logs container.
- Set the condition: Last Modified > 20 days ago.
- Save the rule to automate the process.
🛠️ Troubleshooting Common Issues
- Lifecycle Rule Not Applying:
- Cause: Filters may not match the blob in your storage account.
- Solution: Double-check the filters and ensure they match the desired container, prefix, or blob type.
- Unintended Blob Deletion:
- Cause: Misconfigured deletion policies in lifecycle rules.
- Solution: Review the rules carefully before saving and test them in a development environment first.
- Access Issues for Archived blob:
- Cause: Archived blob take time to rehydrate for access.
- Solution: Plan retrievals in advance and use the Hot or Cool tier for frequently accessed data.
- Error While Saving Rules:
- Cause: Storage account may not support Lifecycle Management.
- Solution: Ensure you are using a general-purpose v2 storage account.
🎯 Conclusion
Azure Blob Storage Lifecycle Management simplifies the optimization of storage costs by automating blob transitions between access tiers or deleting outdated data. This feature helps organizations maintain cost-effective, organized, and secure storage.
Start managing your Azure Blob lifecycles today by logging into the Azure Portal. For advanced features, check out the official Azure Blob Storage documentation.
Learn More: How to Create a Storage Account in Azure